

Every seasoned flooring contractor knows the sinking feeling on a renovation site.
You pull up the old carpet or sheet goods, drop a 10-foot straightedge onto the bare slab, and daylight shines right underneath it.
The building owner or general contractor already committed their entire budget to 7 mm Stone Plastic Composite (SPC) planks or an electric underfloor heating grid. Nobody accounted for substrate preparation in the initial bid. The site superintendent is pressured to protect the project timeline, and the temptation is always the same: throw down an extra foam pad and hope nobody notices the dips.
They will notice. Usually within four months.
By the time the floor begins to fail, the debate is no longer about saving a few hundred dollars on mortar bags. It turns into an expensive dispute over who pays for pallets of ruined click-lock boards, severed heating conduits, and two weeks of business downtime.
The true uneven subfloor cost rarely hits you on day one—it lands as an avoidable, budget-busting callback down the road.
The Subfloor Flatness Tolerance Floor Coverings Demand
A common misconception on commercial job sites is confusing a floor that is level with one that is flat:
- Level means completely horizontal relative to gravity. An older building slab might drop 15 mm across an 8-meter room. For floating floors, an out-of-level slab is visually tolerable and mechanically harmless as long as the pitch is uniform.
- Flat means coplanar. It indicates the plane is completely free from localized ridges (humps) and depressions (birdbaths).
The universal industry benchmark—stipulated in ASTM F710 and virtually every resilient flooring technical manual—is clear: the subfloor flatness tolerance must be within 3/16 inch variation across a 10-foot span (4.8 mm over 3 meters), or 1/8 inch over 6 feet (3 mm over 1.8 meters).
When a substrate exceeds this gap, your finish flooring is no longer sitting on solid foundation. It is bridging empty air.
4 Costly Failure Modes When You Skip Subfloor Prep
1. Click-Lock Tongue Shear on Rigid Core Vinyl
Rigid SPC and WPC cores are engineered for downward compressive loads, not tensile flexure.
When an installer runs a rigid plank across a 6 mm depression, every footstep pushes the board downward into the hollow void. This exerts cyclical vertical shear directly against the micro-milled tongue-and-groove joint. Within months of normal foot traffic or rolling office chairs, the tongue snaps off completely.
Once a click joint shears, seam separation and edge lippage appear across the room. You cannot spot-patch broken click joints—the only remedy is ripping the entire floor back to the starter wall.
2. Radiant Heating Failure and Localized Hotspots
When embedding electric heating mats or hydronic PEX tubing into an uneven slab, applying a dedicated self leveling underlayment for radiant heat is an absolute engineering necessity.
Air is a thermal insulator. Heating conduits suspended inside subfloor depressions cannot shed their heat into the concrete mass. Instead:
- Heat gets trapped in the air pockets, causing elements to burn out prematurely while leaving cold dead spots on the surface.
- Concentrated heat underneath thin vinyl breaks down adhesives into a sticky, shifting sludge.
- Unencapsulated heating wires remain exposed to mechanical damage and punctures during flooring installation.
3. Surface “Telegraphing” on Commercial Sheet Vinyl
Flexible sheet vinyl and 2 mm homogeneous PVC have strong elastomeric memory. If you leave screed chatter marks, aggregate pop-outs, or shallow concrete birdbaths in the slab, glancing ambient light will expose every single ridge through the finish layer within days.
4. Immediate Forfeiture of Manufacturer Warranty
When a project owner calls a factory technical rep over separating seams or cracked vinyl cores, the inspector’s first action is not examining the planks. They place an aluminum straightedge across the floor.
If the slab shows dips greater than 3/16″ over 10 feet, the inspector photographs the gap, cites “substandard substrate preparation,” and denies the claim on the spot. The manufacturer walks away, leaving the contractor or builder to absorb the full replacement bill.
Upfront Prep vs. The Tear-Out Nightmare: Real Numbers
Contractors often ask: how much does it cost to level an uneven subfloor, and is it worth the upfront expense?
Consider the financial reality across a typical 100 m² (~1,076 sq. ft.) commercial fit-out:
| Expense Factor | Proactive Prep with Self-Leveling Mortar | Post-Failure Floor Replacement |
| Leveling Mortar & Primer | Planned baseline material expense | Still mandatory (incurred on second attempt) |
| Finish Floor Covering | Purchased once (installed properly) | 100% loss (locked click planks break during removal) |
| Tear-out Labor & Waste Dump | $0 (clean, bare slab) | Substantial demolition labor and commercial landfill dump fees |
| Radiant System Risk | Heating elements safely encased in mortar | Severe risk of cutting cables during mechanical demolition |
| Facility Disruption | 24–48 hours until full trade traffic | 2 to 3 weeks of lost operations and tenant disputes |
| Overall Cost Multiplier | 1.0x (Original Budget Baseline) | 2.8x – 3.5x Total Investment |
Evaluating subfloor prep cost through the lens of risk mitigation shows that floor leveling before vinyl flooring is not an auxiliary line item. It is the cheapest insurance policy a general contractor can buy.
Why Grinding and Troweled Feather-Edge Fall Short
When dealing with out-of-spec floors, tradesmen often reach for quick fixes rather than a fluid underlayment. On medium-to-large floor plates, both approaches fail:
- Concrete Cup-Wheel Grinding: Grinding works for an isolated 4-inch high spot, but room-wide grinding generates massive airborne crystalline silica dust requiring sealed air-scrubbing. More importantly, grinding removes humps without raising the adjacent valleys. You end up with a dished slab that still violates the 3/16″ tolerance.
- Hand-Troweled Skim Patches: Feather-edge skimming across a large floor depends entirely on the installer’s wrist stamina. It inevitably leaves lap lines, trowel chatter, and inconsistent thickness. Furthermore, common skim patches lack the compressive integrity to support concentrated point loads from rolling hospital beds or heavy retail gondolas.
To achieve an unyielding, monolithic, coplanar surface across an entire floor plate, pouring an engineered self leveling underlayment remains the global industry standard.
Concrete vs. Plywood Substrates: Pre-Pour Requirements
Before pouring any cementitious leveler, identify the receiving base:
- Leveling an Uneven Concrete Slab for LVP: Cleanliness and pore sealing are mandatory. Clear all grease, drywall dust, and curing agents. You must roll an acrylic pore-sealing primer over the slab. Dry, unprimed concrete acts like a sponge; it immediately pulls water out of the leveling slurry, resulting in rapid dehydration, surface chalking, and severe “pinholing” (air bubbles venting through the drying surface).
- Timber, Plywood, and OSB Substrates: Structural deflection is the primary hazard. Wood framing must meet standard stiffness requirements (minimum L/360 deflection under live load). Tighten down loose subfloor panels to eliminate bounce and squeaks, seal open panel seams, staple down alkali-resistant fiberglass mesh, and select a flexible, high-polymer leveling compound designed to absorb subfloor micro-movement.
The Engineering Foundation: FAVOR Self-Leveling Mortar
Not all leveling compounds perform equally. Cheap formulations often suffer from sluggish flow, soft chalky surfaces, or rapid setting times that leave visible cold joints between bucket pours.
Manufactured by Huizhou Chenson Advanced Materials Technology Co., Ltd. (ChenSon) across our 50-acre automated facility with German m-tec production lines, FAVOR Self-Leveling Mortar was formulated to eliminate the specific failure points contractors dread most.
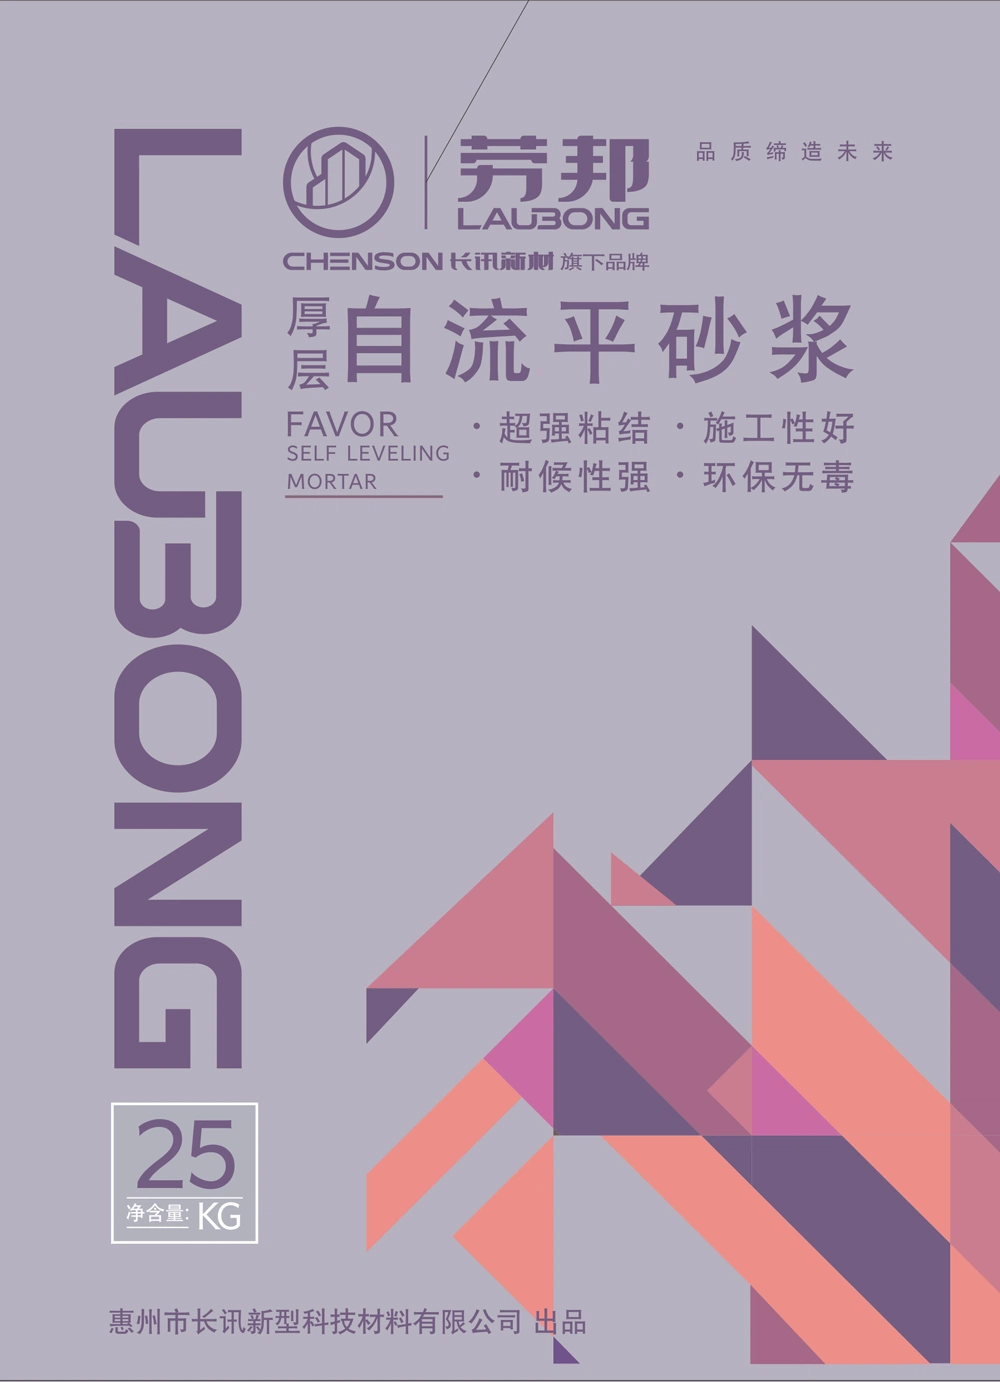
The Critical Edge: 100% Casein-Free & Low Alkalinity
Older traditional self-levelers often relied on casein—an inexpensive milk-derived protein—to achieve fluidity.
Under breathable tile, casein might survive. But under moisture-impermeable vinyl planks or welded commercial PVC sheets, residual concrete moisture triggers microbial decomposition in the casein. Within months, the floor begins off-gassing foul, persistent ammonia odors that permeate the building.
FAVOR is completely casein-free and protein-free. Featuring low alkalinity and non-corrosive chemistry, it eliminates biological decay and will never rot, mold, or smell. This makes it the preferred underlayment specification for sensitive commercial facilities:
- Hospitals, healthcare surgical suites, and laboratories
- Food processing cleanrooms and commercial kitchens
- Heavy-traffic logistics warehouses and educational institutions
Verified Technical Performance (GB/T 25181-2019 Standard)
| Test Property | Standard Requirement | FAVOR Measured Performance | Job-Site Engineering Value |
| Initial Flowability | ≥ 130 mm | Passes | Pours like liquid cream; self-smooths with minimal rake assistance |
| 20-Minute Extended Flow | ≥ 130 mm | Passes | Maintains live wet edge; prevents cold-joint lines between pours |
| Tensile Bond Strength | ≥ 1.0 MPa | ≥ 1.0 MPa | Exceptional mechanical grip; zero delamination from primed slabs |
| Dimensional Stability | -0.15% to +0.15% | -0.15% to +0.15% | Controlled low shrinkage eliminates edge curling and spider cracks |
| Compressive Strength | ≥ 6.0 MPa (Base) | Up to C40 (Thick-Layer) | Easily handles rolling hospital beds, heavy carts, and retail traffic |
| Flexural Strength | ≥ 2.0 MPa (Base) | Up to F10 (Thick-Layer) | Absorbs structural micro-deflection across diverse substrates |
| Abrasion Resistance | ≤ 800 mm³ | ≤ 800 mm³ | Hard, dense, dust-free surface for maximum vinyl adhesive grip |
Two Formulations for Every Job Depth:
- FAVOR Thin-Layer (6–10 mm): Strength grades C16–C40 / F4–F10. Engineered for smoothing minor slab chatter, screed dips, and residential floor prep.
- FAVOR Thick-Layer (10–30 mm): Strength grades C25–C40 / F6–F10. Engineered for deep structural transitions and encapsulating hydronic PEX tubing or electric radiant heat cables without thermal stress cracking.
Quick Rule of Thumb: Material Estimating & Project Takeoffs
Estimating subfloor leveling cost per square foot or meter does not require complex formulas on site. Use this field benchmark:
FAVOR Coverage Benchmark:
Plan for approximately 1.7 kg of dry mortar per square meter per millimeter of thickness.
In practical terms: one standard 25 kg bag covers approximately 1.8 m² at an 8 mm depth (accounting for standard 5% job-site waste).
Need an exact takeoff for an upcoming project or tender? Don’t guess. Send your floor area and depression depths directly to our engineering team via WhatsApp (+86-17520066277) or email wjc.2628@gmail.com for a complimentary bag count and direct-factory quotation.
Job-Site Rules: How to Pour FAVOR Without Callbacks
- Water Ratio Is Law: Mix at 1 : 0.15–0.17 by weight (approx. 3.75 to 4.25 liters of clean water per 25 kg bag). Never eyeball water with an open hose. Adding excess water creates surface bleed, leaves chalky laitance, and severely reduces compressive strength.
- Work Within the 30-Minute Pot Life: Once mixed, FAVOR remains in optimal fluid condition for 30 minutes. Organize your mixing stations and pour routes so you are consistently pouring into a fresh wet edge.
- Roll With a Spiked Roller Immediately: As soon as the material is pulled with a gauge rake, make smooth passes with a spiked roller. This de-aerates the slurry, pops surface bubbles, and knits adjoining batch pours together seamlessly.
- Mind the Temperature Limit: Ambient and substrate temperatures must be consistently above 10°C. Curing below 10°C retards hydration chemistry and compromises final surface hardness.
- Never Re-temper Stiffened Mortar: If mixed mortar begins setting in a bucket, discard it. Adding water to reactivate hardening mortar permanently destroys the crystalline polymer matrix.
Frequently Asked Questions
Why do click-lock vinyl planks uncouple months after installation?
When a rigid core vinyl plank spans a low spot exceeding 3/16″ over 10 feet, downward foot pressure exerts continuous vertical shear on the micro-milled click tongue. This repetitive flexing shears the tongue, causing visible joint separation, edge lippage, and hollow crunching sounds.
Can FAVOR self-leveling mortar be used over radiant floor heating systems?
Yes. FAVOR possesses high thermal stability, minimal shrinkage (-0.15% to +0.15%), and non-corrosive chemistry. When poured over hydronic PEX pipes or electric heating cables, it completely encapsulates the elements without air voids, providing uniform thermal conductivity and zero cracking under thermal expansion.
What is the advantage of a casein-free self-leveling underlayment?
Casein (animal protein) decomposes when moisture is trapped underneath impermeable vinyl, rubber, or PVC sheet flooring. This breakdown generates foul ammonia gas and fosters bacterial growth. FAVOR’s synthetic, protein-free formulation eliminates biological contamination, making it mandatory for hospitals, cleanrooms, and food plants.
How soon after pouring FAVOR can I install vinyl plank flooring?
Under standard curing conditions (20°C, 50% relative humidity), FAVOR accepts light foot traffic in 4 to 6 hours. Depending on pour depth, ambient ventilation, and adhesive requirements, resilient floor coverings can typically be installed within 24 to 48 hours once moisture testing confirms substrate readiness.
Does ChenSon support custom mortar formulations for hot or humid climates?
Yes. Backed by our Changxun Technical Center (TC) and three automated m-tec production lines, we regularly customize hydration rates, open times, and polymer additives for overseas engineering projects facing high temperatures or extreme humidity across the Middle East, Southeast Asia, and the Americas.